Before and After – our camper renovation
We’ve now been on the road for about 7 weeks and I’m totally smitten with our new lifestyle.
In my last post I announced we’d be traveling full time. And here we are a few months later. The website/blog look a little different, we officially have a new name – Brittany Lauren Creates – and we’re shifting gears. Now that the studio is closed while we’re on the road, this little blog is going to have a lot more behind the scenes of traveling, DIY projects, how we stay healthy on the road, lessons learned along the way and all the fun in between! Everything related to photography education and numbers for creative entrepreneurs will be over at Simply for Creatives (previously Learn with B).
As you can see, pretty much everything around here is changing and for the better. Now that I’m not working in the studio full time, I can dive into other projects that have been on my heart for awhile. But for now, here is the full before and after of our DIY camper renovation! You can also check out Montee the Camper on Apartment Therapy and Today.com. He’s had some pretty cool features.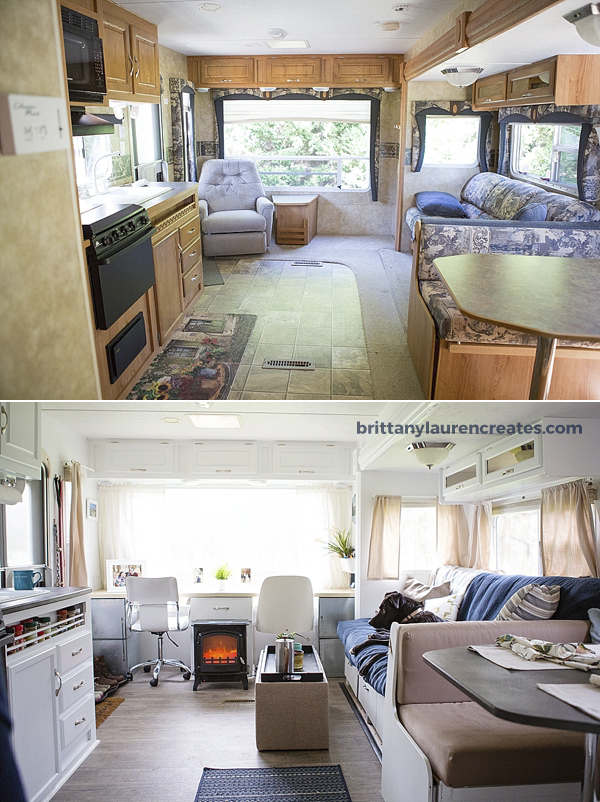
 The Breakdown:
We bought our camper in October 2015.
We took 2.5 months to complete the reno.
We hit the road January 2016.
The camper cost $8000.
We did the reno for $2500.
What was most important:
• To have a functional space for each area you’d have in a normal house – kitchen, living area, dining, office, bedroom, bathroom
• To feel at home and inspired by the layout, colors and textures.
• Storage solutions that made sense and were aesthetically pleasing.
• All systems (water, electric, sewer) worked properly and safety checks for traveling.
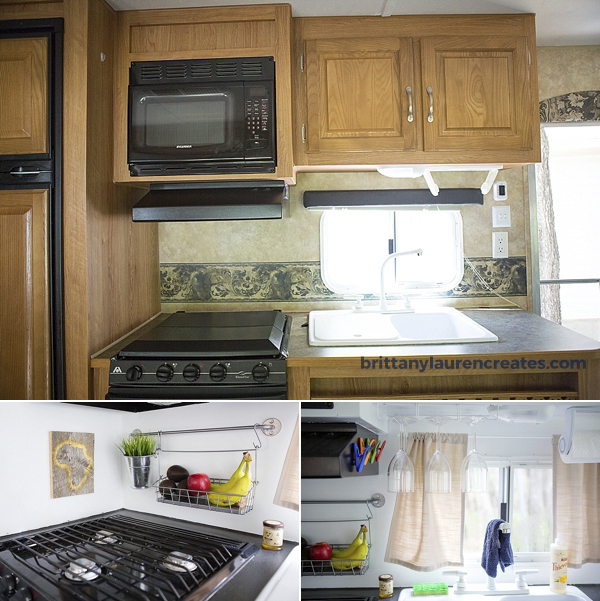
What we did:
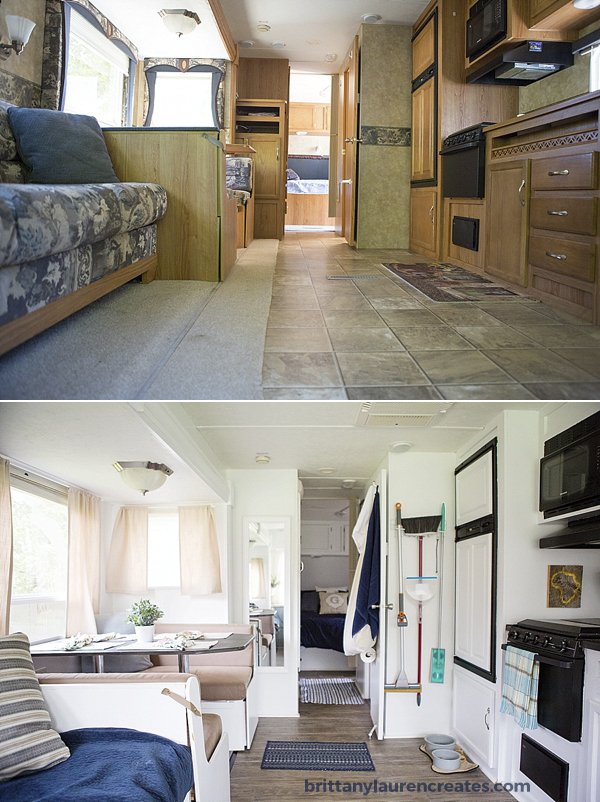
• Took out all the flooring and replaced with vinyl flooring.
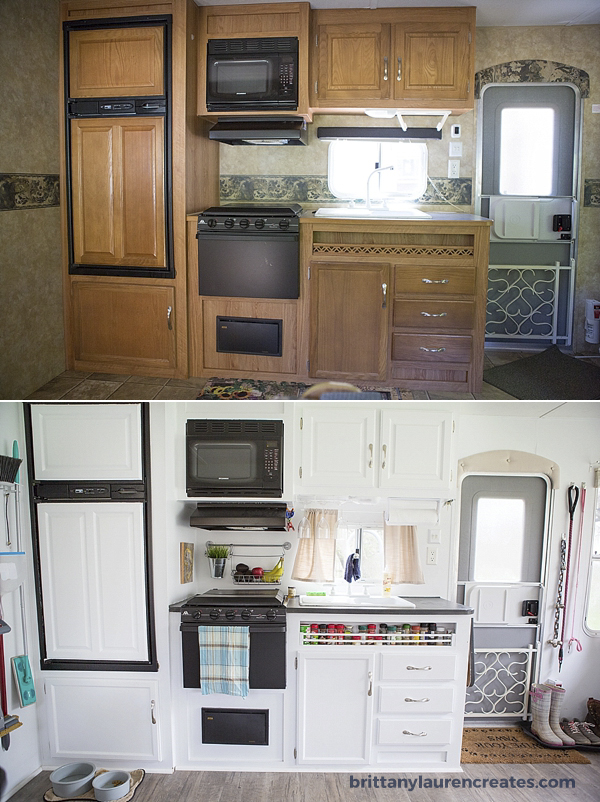
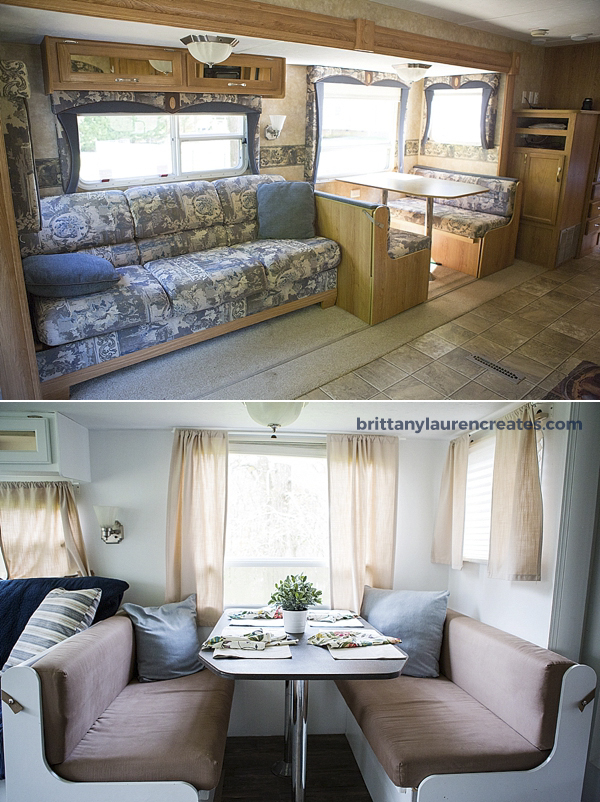
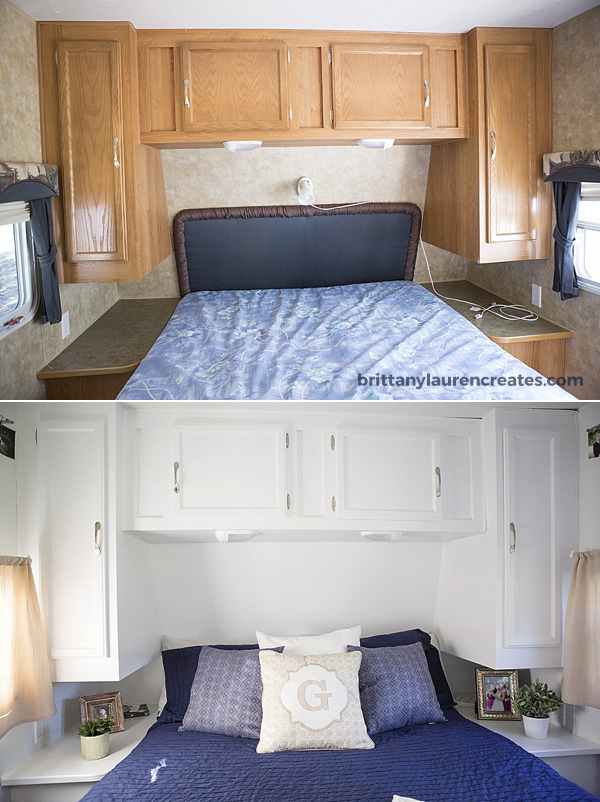
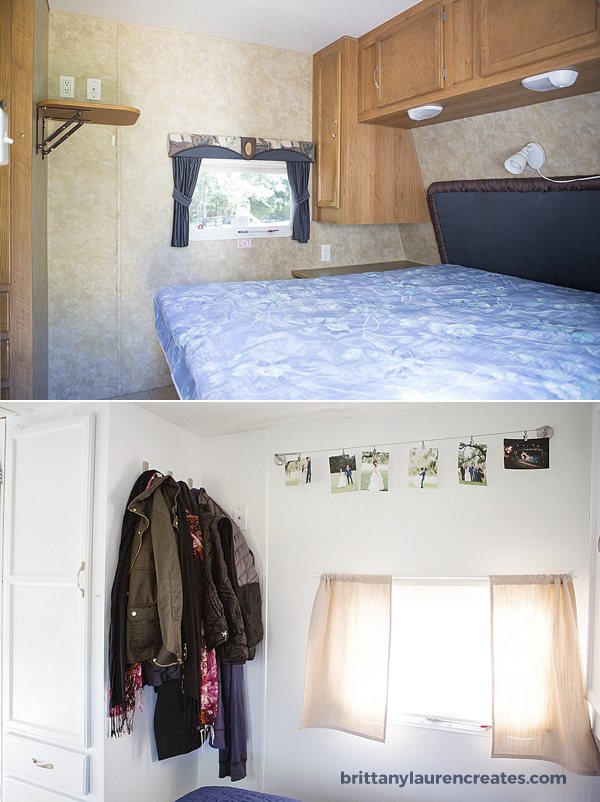
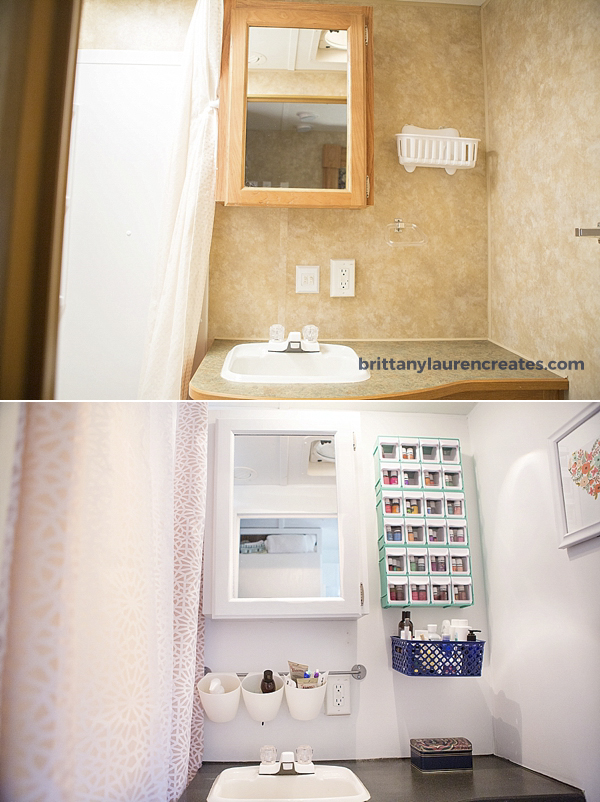
• Painted all the walls and cabinets white.
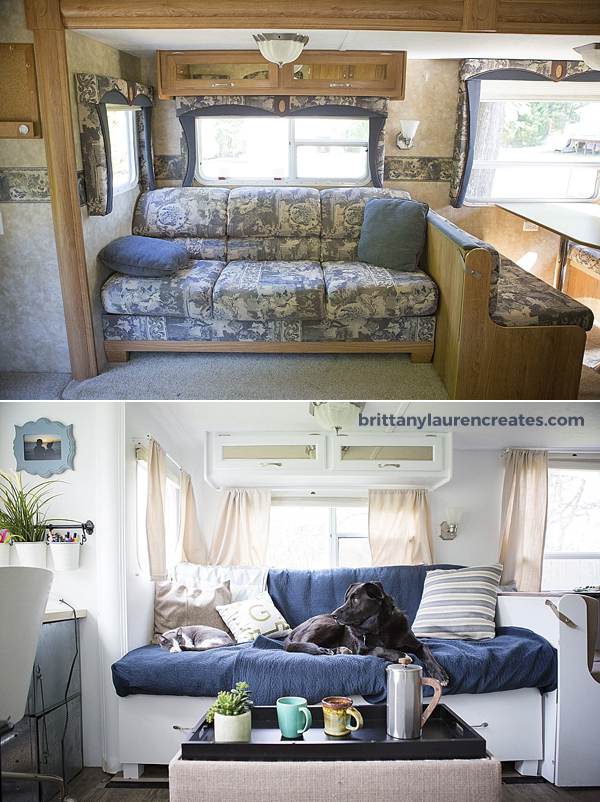
• Built a custom futon with 3 drawers for storage underneath.
• Tore out the half cabinet in the hall and built a custom pantry that goes to the ceiling.
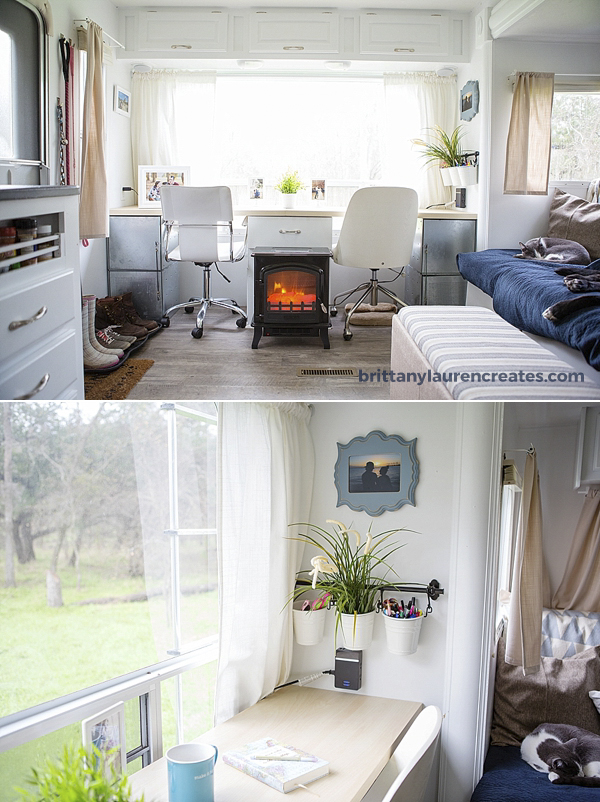
• Created a double desk area at the big window.
• Extended the pull out drawers under the dinette seating.
• Made new curtains for all windows (thanks mom!)
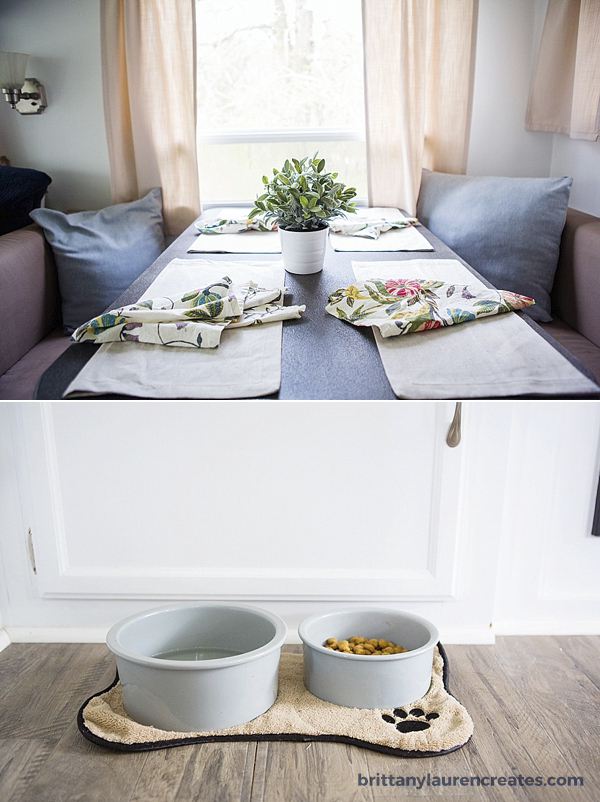
• Made new seat cushions for the dining table seating (thanks mom!)
• Made new pillows for each area (thanks mom!)
• Made a custom futon cushion cover and blanket (thanks mom!)
• Repaired several leaks and sealed the roof, windows and gaskets on the outside (thanks dad!)
• Painted all countertops and table tops with textured paint and sealed.
• Added additional fold up counter space in kitchen.
• Cut a new shelf in the bathroom cabinets.
• Added storage and functionality wherever possible.
Biggest renovation surprises:
• The painting took about 5 times longer than I thought. A weekend project turned into a 2 week ordeal with 2-3 people painting at any given time.
Biggest advice if you’re thinking of a reno:
• Don’t add a lot of weight with changes you make. You want to keep the trailer around the same weight unloaded.
• Think about your needs on the road and make changes to fit your lifestyle.
• Do research on the best materials and supplies to use.
• Ikea has great storage solutions for everything!
• Give yourself plenty of time to complete everything and ask people to help when you need it.
The gallery below has all kinds of in between progress and behind the scenes of some of the individual DIY projects like the custom couch, some late nights, water leaks, laying flooring, cutting out cabinets and so much more.


Our little camper took on a whole new life with a little TLC. We’re excited to call this home for some time while Jordan chases his dreams of the PGA tour. I hope our before and afters help inspire something in your life whether it’s a camper reno, that DIY project you’ve put off forever or a dream you’ve had on your heart.
If you have any questions, leave them in the comments below. I’m happy to help!
I totally forgot you had taken that photo of me! So happy for you guys and excited for all of your adventures ahead! Miss you tons!
Brittany,
This is all so amazing! My grandparents had a full motor home we recently sold, as it hadn’t been used in decades, but this makes me wish we kept it!
Where did you find that fire place? Is it electric?
Thanks Kimberly! It was a fun project for sure. And the fireplace is electric. We found it at Walmart on sale for $44. We use it on chilly nights so we don’t burn through our propane as fast and it adds a homey feel 😀
Yay for this post!!! Love it!!! Miss you miss you miss you miss you miss you!!
What paint did you use on your camper walls? Your camper looks beautiful!
Thanks Sarah! We used HGTV Home by Sherwin-Williams Cotton White in semi-gloss.